We added a screened-in porch and are so in love it!
I am soooo late on sharing the process of our newly built patio but I guess it’s better late than never! It’s so much easier and faster to share everything in real-time over on my Instagram. But I always try to document as much as I can on the blog because it helps to answer questions and direct people to one spot. Hopefully, all your questions are answered here and you can find all the screened-in porch details. Just a little warning, this is a long and picture heavy post!

This July will mark our 9th anniversary in our home. I still remember that hot summer day during July 4th weekend when Jimmy and I closed on our home and we couldn’t believe that we were the owners of this special home. We could hear our new neighbors barbecuing and playing outside as we walked into our home with eyes wide open. We had dreams to fill this home with love and watch our kids grow up and make so many special memories.
A few months after we moved in, I got pregnant with Emmy. Something in my heart changed and it was open to having another baby. When we were living in the 1200 square foot townhome, I thought we were done growing our family with our two kids. Something about moving here changed our hearts and I’m so glad it did because we can’t imagine our lives without our little Emmy. She is pure joy and completes our family of 5. She’ll be turning 8 in a month!

I started the blog when Emmy was around 1 and the rest is really history. So much love has been poured into our home. I saw a blank canvas and used my creativity and energy to create a home we absolutely love. When shopping for our home, we actually almost moved into another house that had the most amazing sunroom and hardscaped backyard complete with hydrangea bushes. I was completely sold on those qualities but I’m so glad that we ended up not going through with that home. Over the years, I planted those same hydrangea bushes and dreamt of a patio like that other home.
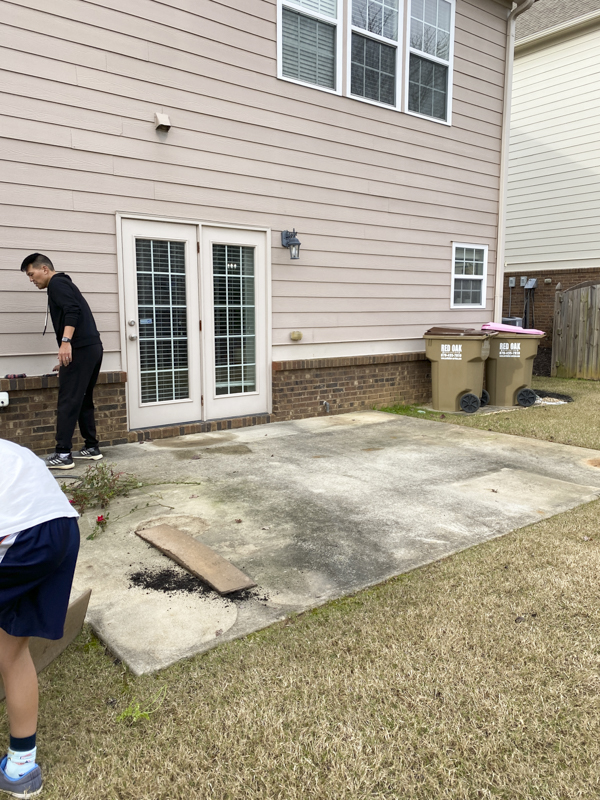
For years, our dream has been to add a screened-in porch right off our kitchen. No matter what we did with the backyard, we rarely spent time out there. Flies, mosquitos, pollen, and the hot humid weather were certainly factors that prevented us from using the space. Don’t get me started on the number of lizards and salamanders that snuck in through the back door. JJ has saved me on multiple occasions!

We saved and decided it was the right time to make our dreams become a reality. 2020 taught us a lot of things and one of those was that our homes are our sanctuary and respite from all that’s happening out in the world. During the pandemic with the stay-at-home order, Jimmy kept telling me how thankful he was that I had spent so much of my time and energy creating a home we loved.
Last November, Jimmy and I hired our good friends and neighbors, Jay and Sunny who own Tailored Living. We completely trusted them because we have seen their work and they had also just finished their own screened-in porch. When we saw them use it throughout the hot GA summer months, we were sold. If you are in the North Atlanta area and are looking for closet organization installation, garage epoxy, or any sort of remodeling work, they are your people! I will share their info at the bottom of this post.
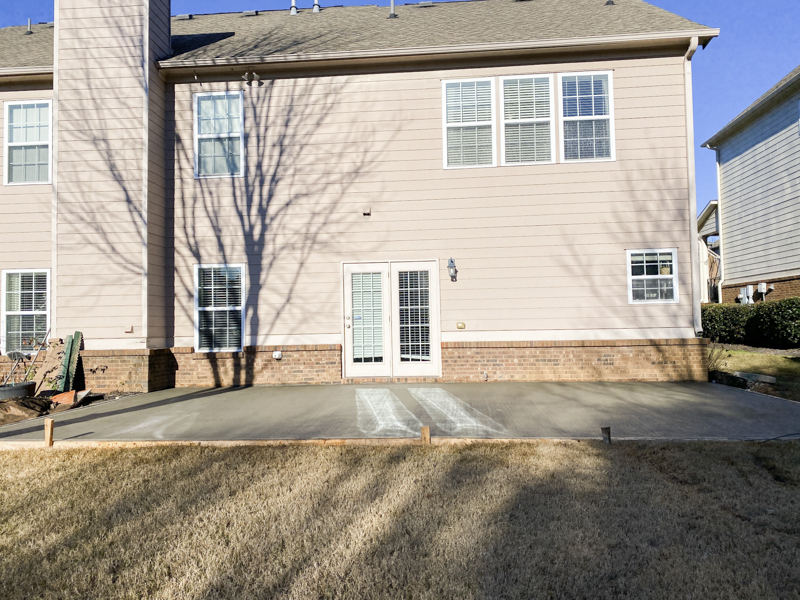
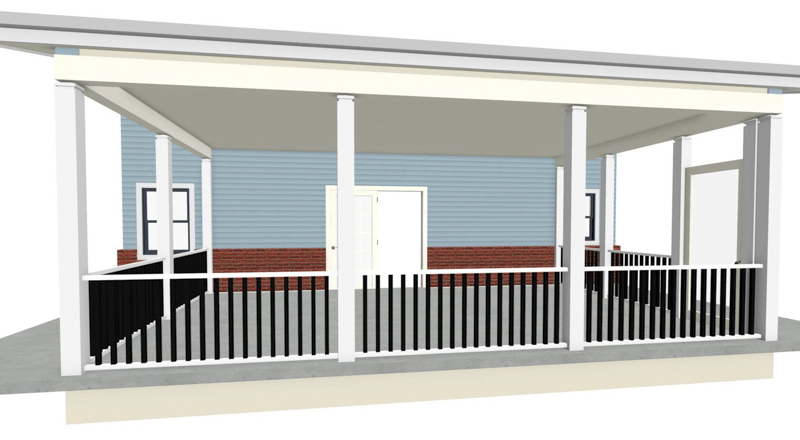
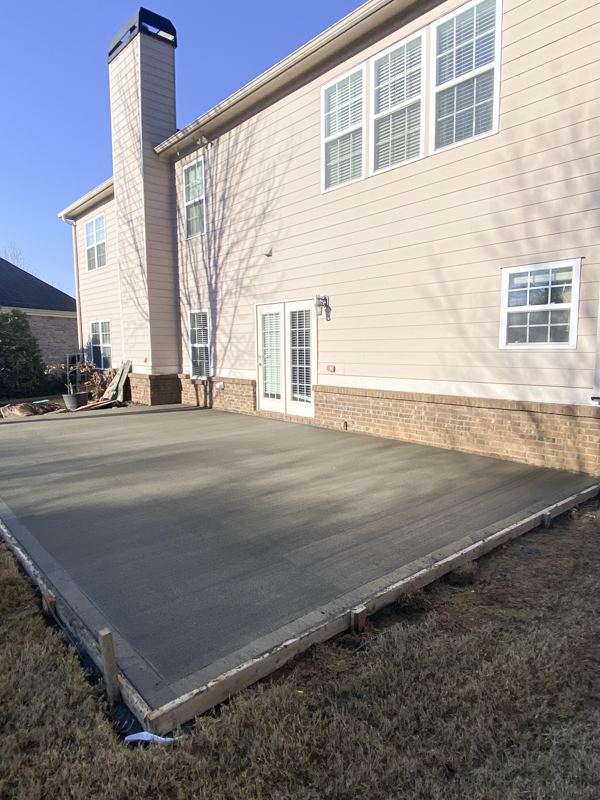
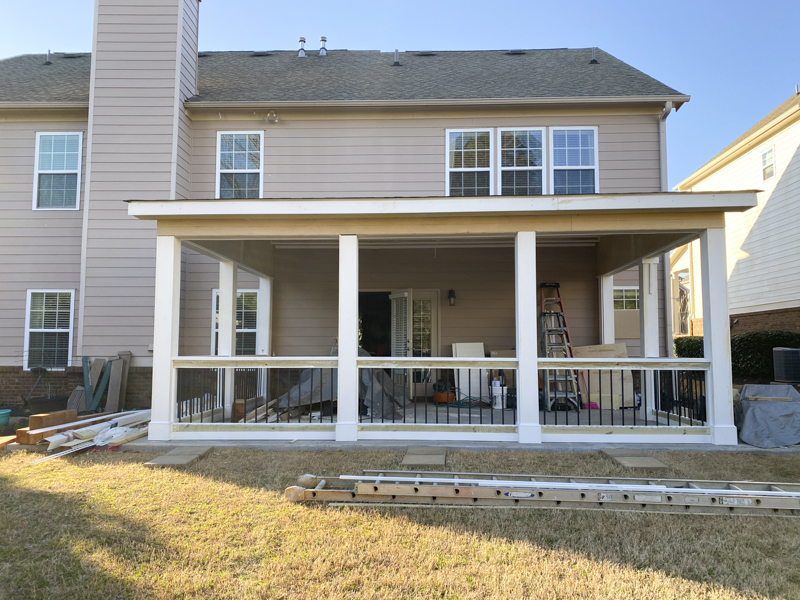
We first decided on the size and their project manager, Colin drew up some renderings with their software. The concrete slab is 30.25 x 16 which is roughly around 484 square feet.
We wanted to build the screened-in porch as big as possible but not cover any of the windows which are located in the kitchen and family room. I didn’t want to sacrifice any daylight coming in through the home. We ended up going with 21 x 14.7 feet which is around 310 square feet for the actual structure.
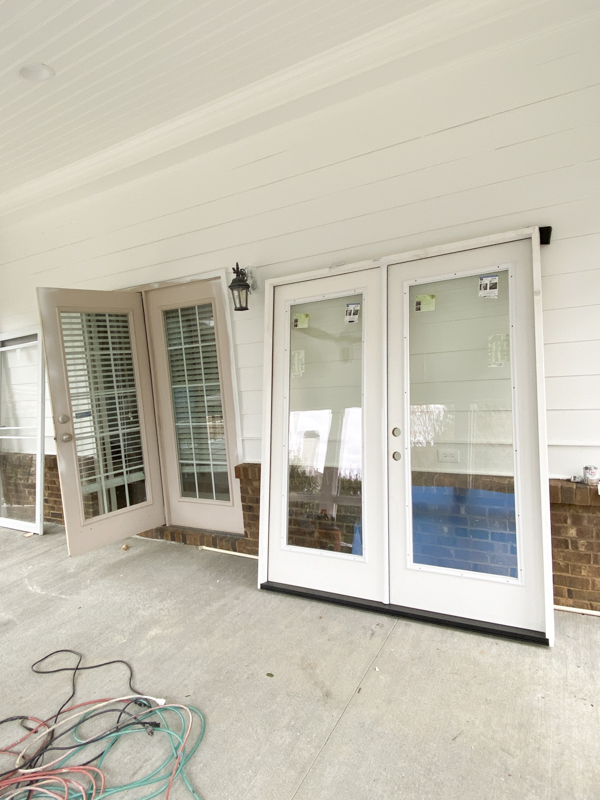
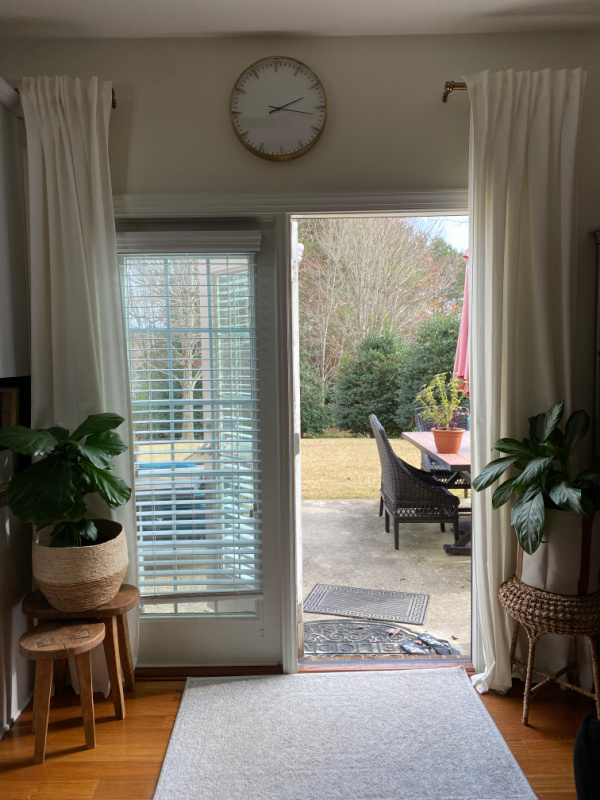
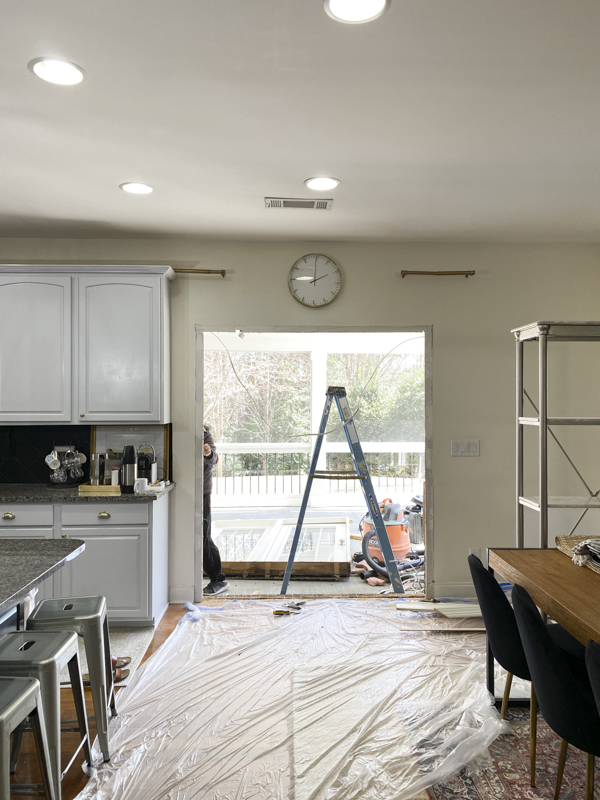
One of the most important details was removing the patio door and long window. Builders like to put these in because it’s much cheaper than double doors. The left is basically just a long window that mimics a door. There’s a median in the middle with a door on the right side. I knew I wanted to install double french doors that would open into the patio. I made sure they didn’t open inwards. Had we done this, the doors would have encroached into our kitchen/breakfast area and the hit the cabinets. I can not tell you how much of a difference this one decision made for the whole look and feel of the patio.
Now, I’m going to answer the most frequently asked questions that I received on Instagram. If you have any other questions, please leave them in the comments section.
How long did the whole project take?
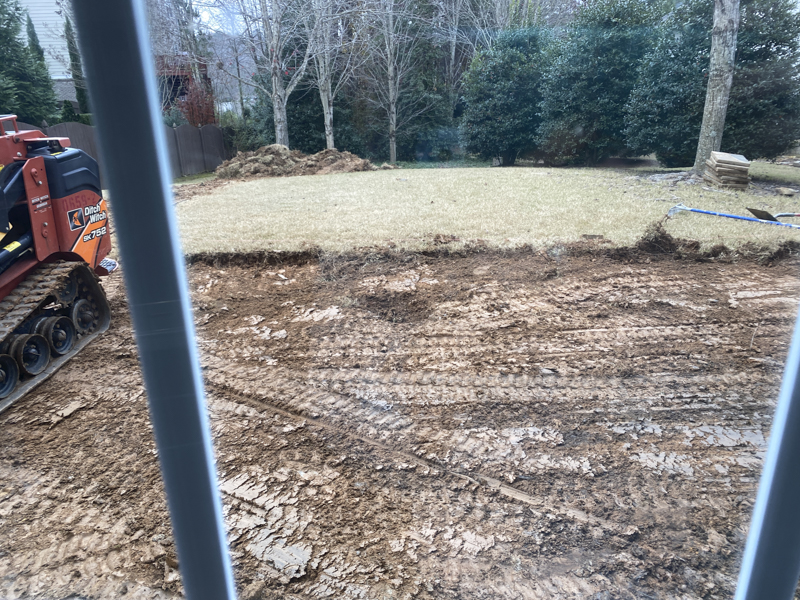
-The concrete took one full day to demo and pour. We couldn’t use the existing concrete due to cracks. This was done in December.
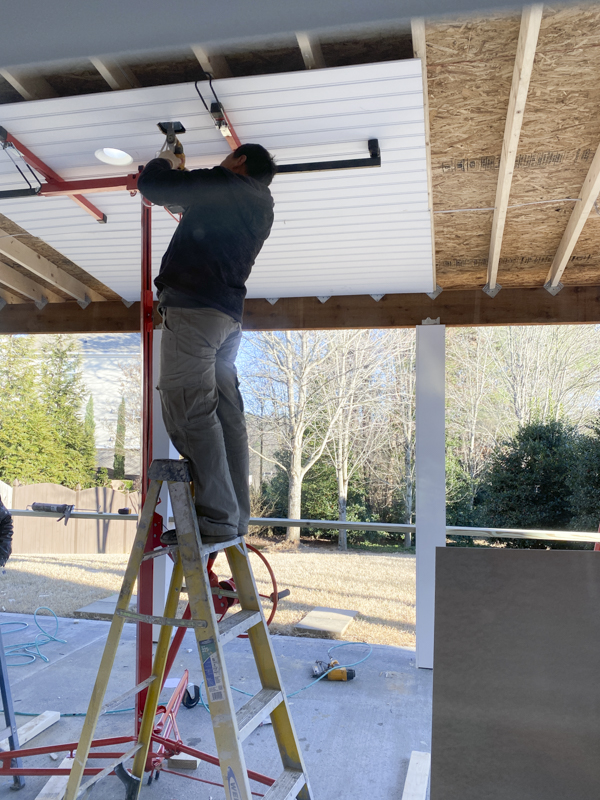
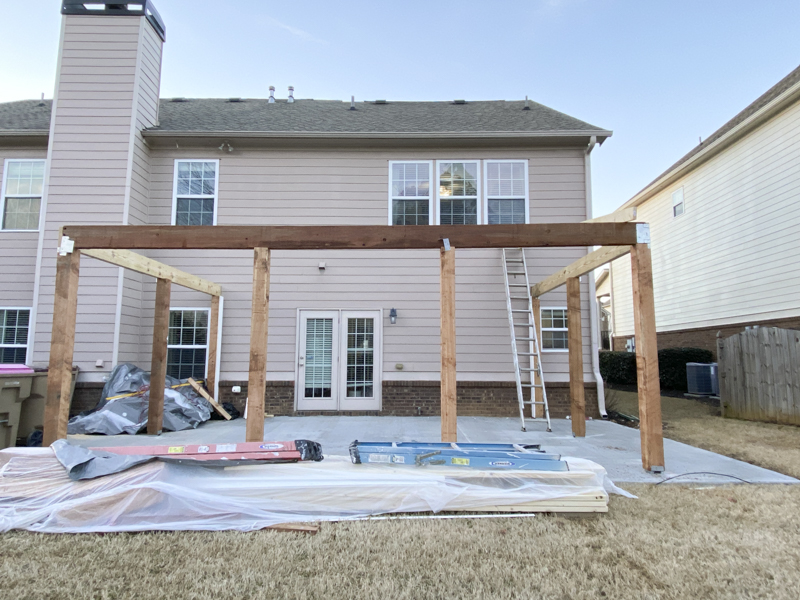
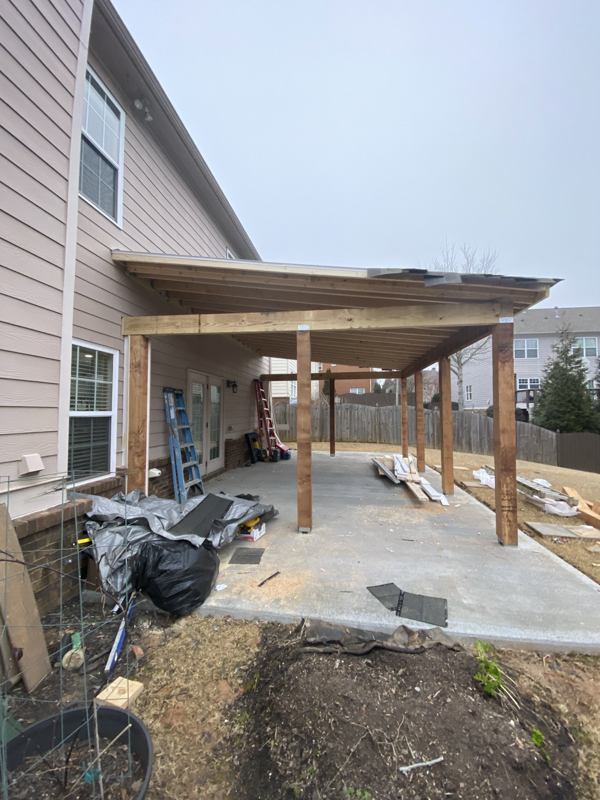
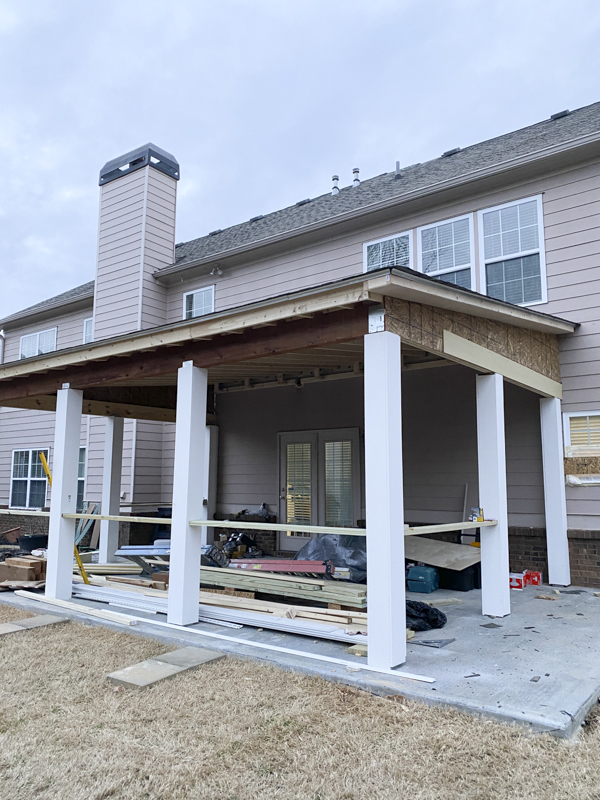
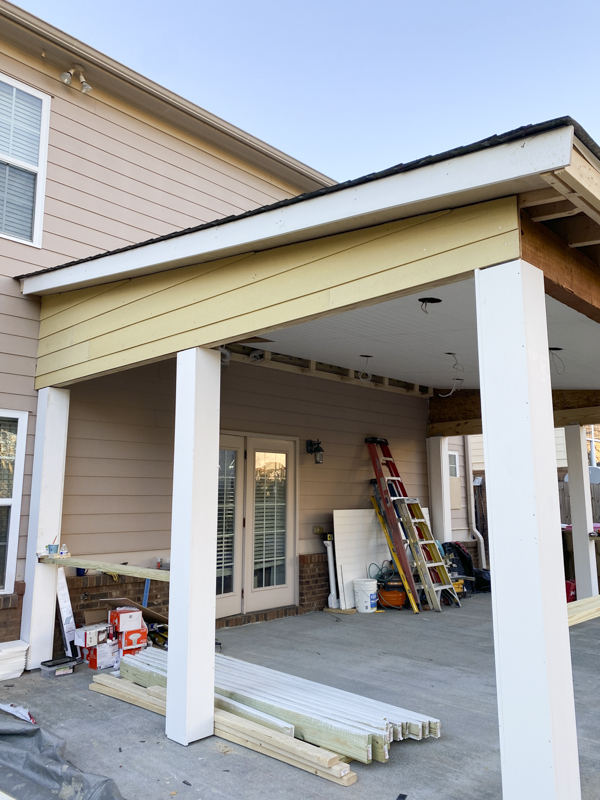
-They started building in February. The structure took 32 actual days of work. Take in weekends and a few days here and there, it took a little less than 2 months. Most days, they worked 12 hour days. I was so impressed by the quality of work and dedication to detail.
How did you decided on the design?
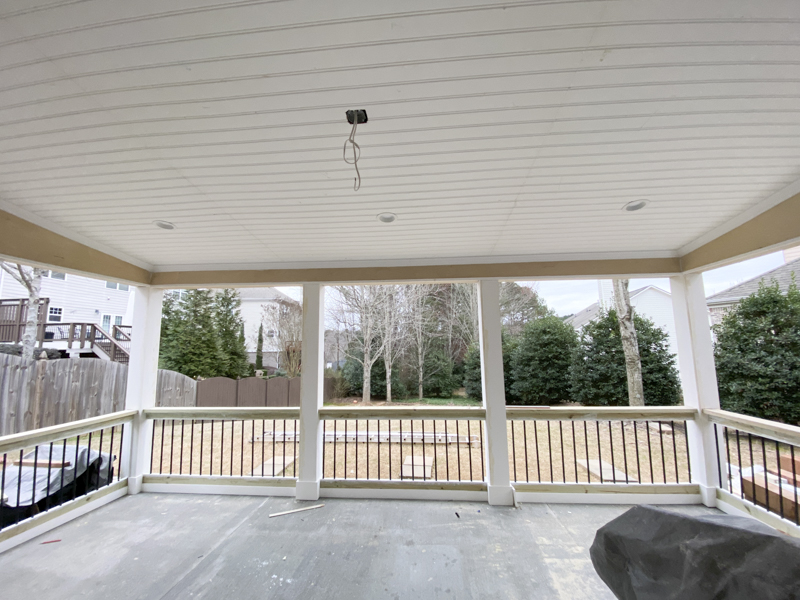
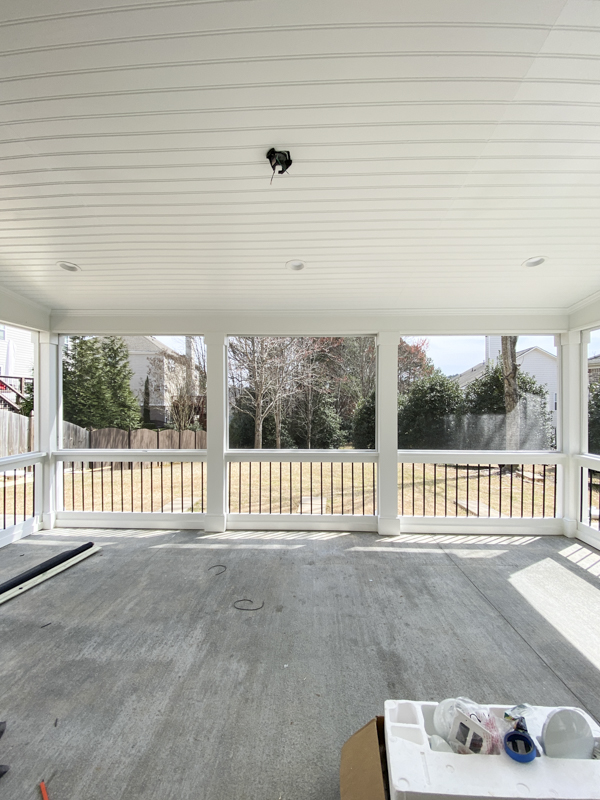
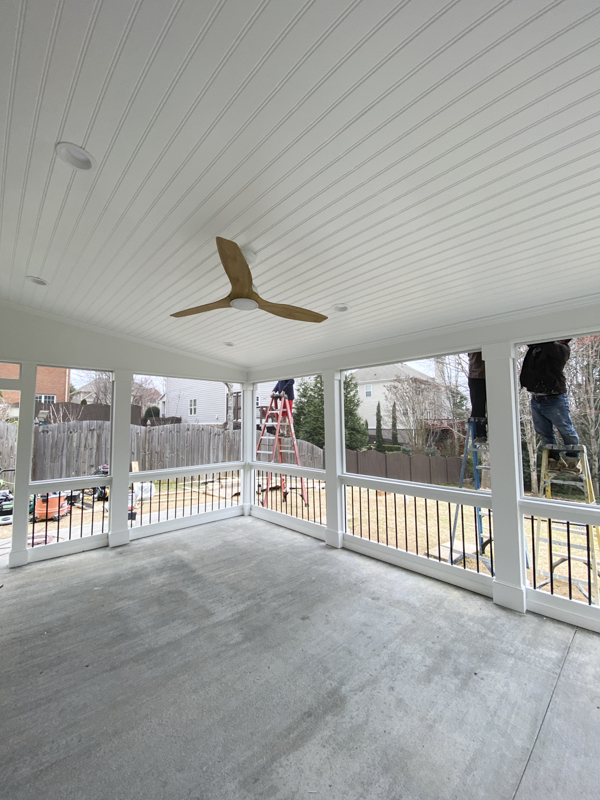
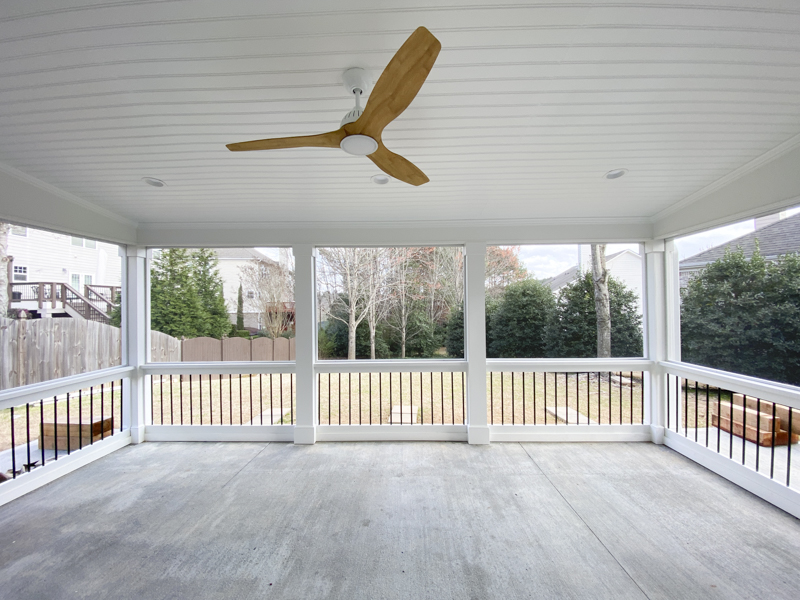
-I trusted our friends with the design and once they shared the renderings, we approved it. We also went through our strict HOA to make sure it was approved before starting the build. There were a couple of changes that we made during the process. The ceiling was going to be level but then I asked to see if it could be slanted like the the actual roof. They made this change and it makes the room feel bigger with the higher ceiling.
What are you going to do with flooring?
-We have to wait 6 months for the concrete to fully cure. We are still undecided on this because there aren’t as many options as I would like. I was planning on tiling but we are living with the concrete until we decide what to do. The pros about keeping it as is is that we don’t always feel like we need to clean it. I’m afraid if we get nice flooring, I will be cleaning them incessantly since it will look like an indoor room.
How do you keep it clean?
Since it’s still an outdoor space, pollen, dust and debris still find a way in. We use the blower and I wipe down the table whenever we use it. There is no escaping the pollen here in GA. It’s about 3 weeks of incessant pollen everywhere and then it’s gone.
How did you decide on the size?
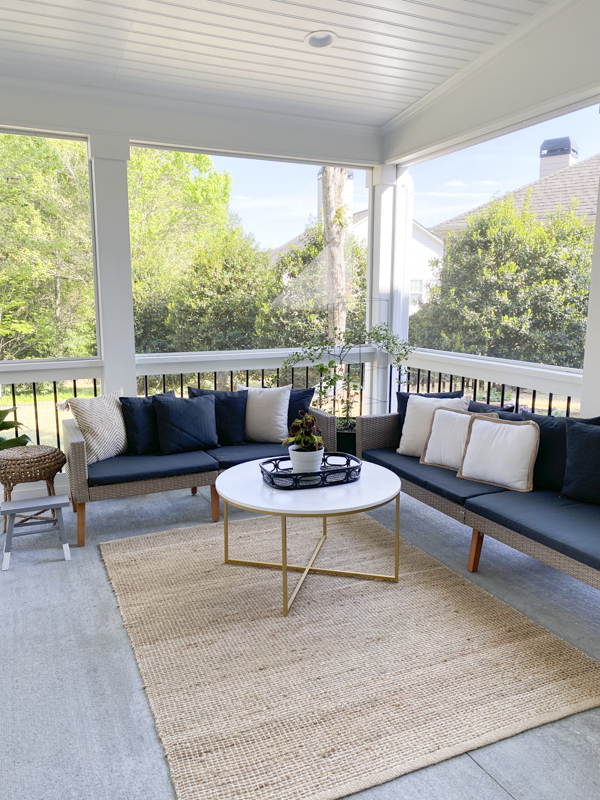
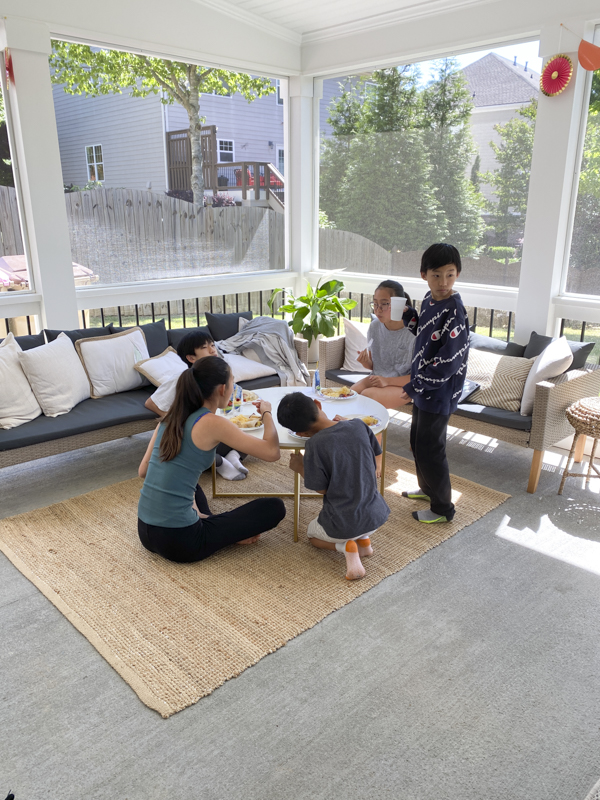
I wanted it to be as big as possible so we extended it right outside the windows on both sides. I planned on adding both a conversational, dining set and maybe even a daybed or some comfy place for me to take naps. 😉 I can’t stop taking naps out here and I’m not even a nap person!
Were you happy with the company you used?
-First of all, we can’t say more great things about this company. Every time there was an issue or question come up, they were responsive and quick to address it. I have had so many issues with contractors in the past, showing up late or not showing up at all. These guys were the opposite. They showed up early and stayed late. I had to force them to take breaks with coffee and snacks.
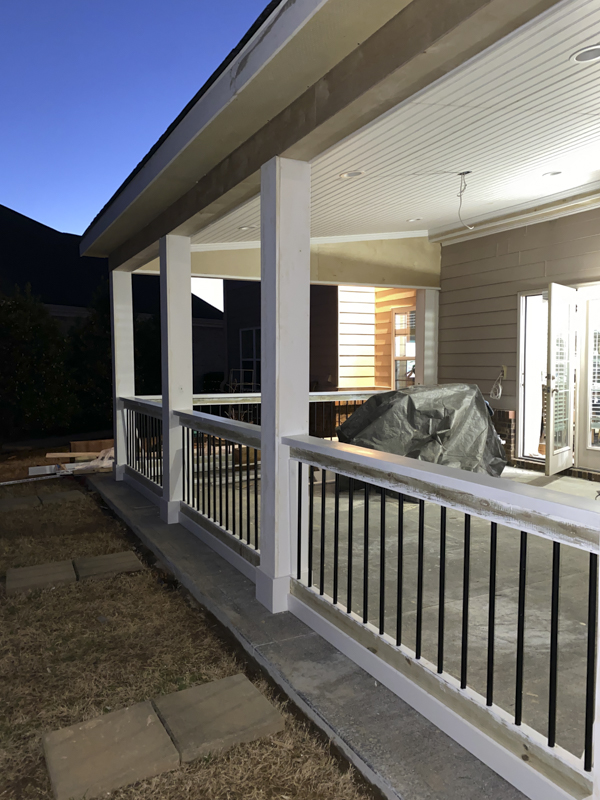
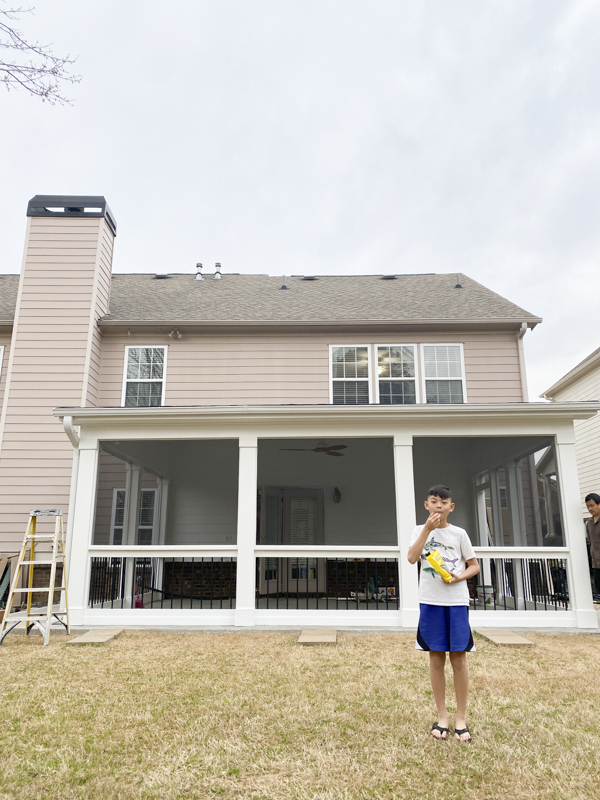
Isn’t it so cool seeing the progress? I made sure to take photos after each day because the progress was amazing to watch. It is so beautiful!
Why did you decide to hire out and not DIY?
-Jimmy and I contemplated this decision and decided not to DIY for these following reasons. First, we have no experience building a structure or anything like this. It would have taken so much time to research and we didn’t want to take a chance on making mistakes that could cost us more. The main reason was time. Jimmy works full time and his rest time is better spent actually resting! We may have saved money but in the end, we saved time and time is money. Had we done it ourselves, we still would not have a patio. We wanted to use it immediately.

Why did you add polycarbonate on the bottom?
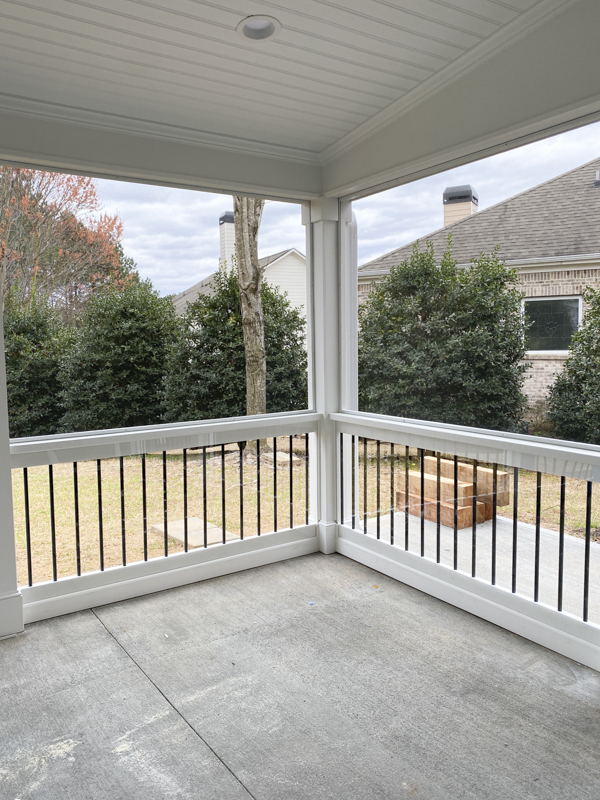
-This is a special feature that our contractors add as a nice detail. There’s screen on top of the railing and the bottom is polycarbonate. They custom build the patio so it’s not the same as another patio. The polycarbonate is a tough transparent material that mimics glass. Practically, it helps to keep extra dust and water from coming in. We just hose it from the outside when we need to clean it. They also installed iron ballusters which is a nice upgrade from wooden ballusters. I think it elevates the look and feel of the entire patio.
Will you do anything else to the space?
-I plan on painting the brick so that it’s the same color white as the walls. We will most likely add tile or some other flooring later on. We are also in the process of adding custom shades! Stay tuned for that. I’m also still waiting for some more furniture to arrive. We also need to build something outside where we can hide our ugly trash cans because they are such an eye sore sitting outside the patio. The dead grass situation is currently being addressed as well.
Was there any demo going on inside your home?
-Yes, just a little. We had the water spigot moved since it was inside the patio. Mr Kang moved it outside and there was minimal work done inside the home.
What color white did you use?
-Sherwin Williams was kind enough to provide the exterior paint. We used 6 gallons of Emerald Exterior Acrylic latex in Pure White SW7005.
Where is that gorgeous fan from?
-Finding a nice looking fan can be tough! This gorgeous Kichler fan was kindly provided by my friends at Lighting Design Company. We also added 6 recessed lights that are controlled by a dimmer switch.
Tell me more about those french doors
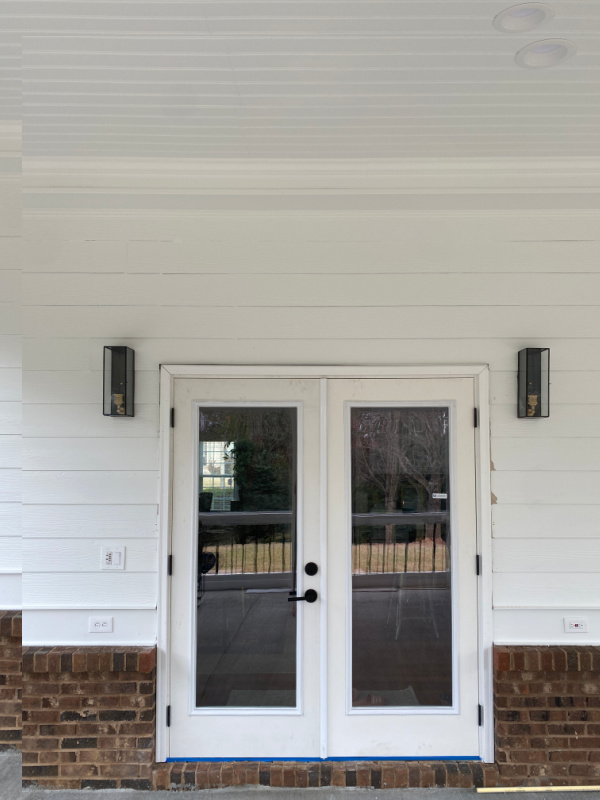
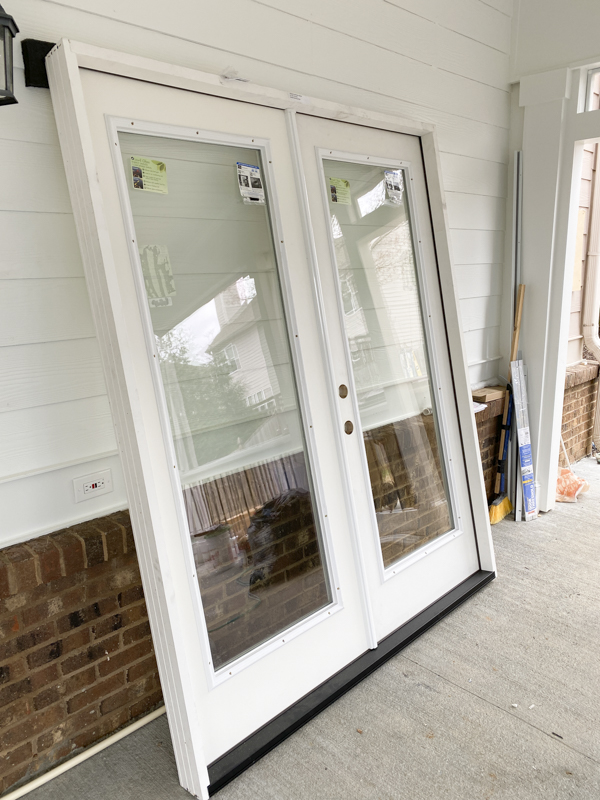
-I won’t lie. These french doors were a big pain in my a$$. First off, there aren’t many amazing options available that don’t cost thousands of dollars. So I decided to go with these simple french doors. Please make sure you have them delivered to your house because that’s free! I chose to ship to store because it added another extra month to have them delivered to our house. Since we needed them asap, I chose ship to store so that we could pick up the doors with our minivan. I had no idea the doors were already trimmed out and wouldn’t fit inside our car. Mr Kang did a great job installing them and building out the trim. I went with this sleek black handle and dummy handle for the doors.
When Jimmy went to pick them up at the store, they employees brought out the doors that were standing upright all packed inside huge pallets. There was no way that was going to fit in the van. He had to go another day and rent a huge uhaul truck. They were very heavy and let’s just say I’m so glad they are in. You just need to watch my saved IG highlights saved under patio to see the whole fiasco.

Can you use indoor furniture outside?
-I recommend using outdoor furniture and rugs for your patios. We are currently using our black table outside along with some farmhouse chairs because we’re still waiting on some furniture. The table was a FB mktplace find so it’s not really a big deal if it gets scuffs and such.
And lastly, the most important and most asked question of all is how much was everything?
-I don’t know if this is a cultural thing but I’m not always a fan of saying how much was spent on something. It feels a little tacky. However being a DIY/design blogger, I always feel the need to be transparent especially because you guys are usually interested in doing similar things. The whole project cost around 50K+. Holy cow! Why is it so expensive? Here are the reasons why. Please take into account this doesn’t include the white paint and fan since those were gifted to me.
- Have you heard? The demand and price of wood has really gone up. Everyone is doing home projects. Last year’s crazy circumstances really affected the supply of wood so much that builders are having a really hard time building homes. My contractor was sharing the difficulties with this factor.
- Our patio size is on the larger size and building a whole entire structure including roofing is quite expensive. You can choose metal roofing but it doesn’t look as good and won’t last as long.
- Our contractors don’t spend money on cheap materials. They built the structure using cedar wood which is really the highest quality you can buy. We wanted something that would last and have minimal maintenance for the future.
- They added nicer details like polycarbonate, iron ballusters, and custom trim work.
I will add that we got one more quote from another contractor. The price was cheaper but it didn’t have as many amazing details like the ones that came with our patio. In the end, we are so happy with going with Tailored Living because we not only do we love promoting our friends’ small business but we knew we could trust them to make our patio dreams a reality. They really went above and beyond and we are so happy with it. If you’re interested in doing something similar and live in the north Atlanta area, here is their info. I will ask that only serious inquiries be sent to them as they are super slammed with so many ongoing clients!
Tailored Living (Jay Kim: Owner/Designer) jkim@tailoredliving.com Tailoredliving.com
Let’s look at a final before and after!
BEFORE
AFTER
BEFORE
AFTER
Whew, that was a long post! We have used this space almost every day since it has been completed. We work, eat, read and hang out and it’s truly an extension of our living room.
If you have any other questions, please leave them in the comments section.
Thank you for reading!
xoxo,
Let all that you do be done in Love. 1 Corinthians 16:14
This post contains affiliate links for your convenience.














Hi!
Can you tell me the door you purchased? I’ve been looking for over a year. I looked on the website but didn’t see French door.
Thank you for sharing your creativity! ♥️
Hi Kathy, these are the doors we purchased. Hope this helps!
http://homedepot.sjv.io/2rkMm7