Demolition began in our master bathroom and we’re sharing all about our renovation week 1 progress.
Last week, I shared about the Jeffrey Court competition that I’m participating in for 6 whole weeks along with 14 other DIY bloggers. Jimmy and I chose to tackle our master bathroom and we may be in over our heads. This is by far the biggest project we have taken on and we’re literally learning how to do this as we go. Here are some shots of our master bathroom renovation week 1 progress. You can also read about my first post that I shared last week regarding this fun and crazy design challenge.
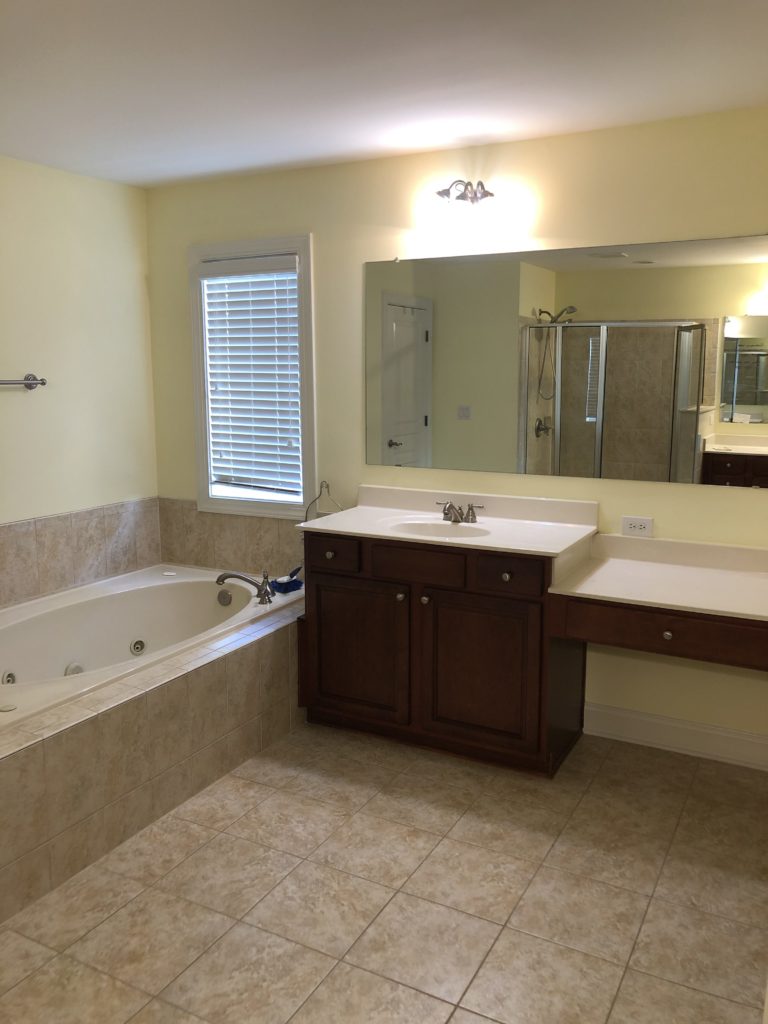
BEFORE
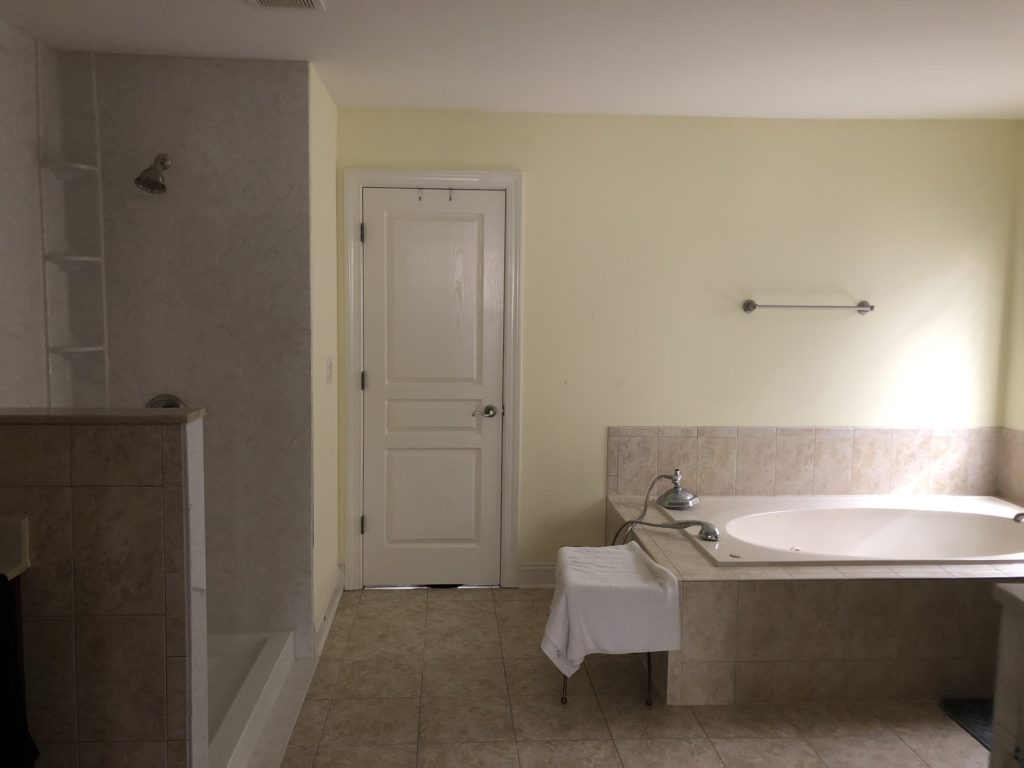
Our master bathroom is a little under 200 square feet so it’s actually a very large space. Due to water damage issues in the shower, we actually have not used our shower since last summer. We tried to get it replaced last year but we were both so busy and it just kept getting pushed back along with the fact that we just couldn’t find a good reliable contractor.
We finally addressed the shower issue in January. We had no plans to do any other major updates except some cosmetic changes to this bathroom until I got invited to participate in this awesome challenge. Jeffrey Court sells a variety of beautiful tiles at Home Depot. The funny thing is I actually went to the tile workshop last summer at Haven. It was sponsored by Jeffrey Court and the Handmade Home gave us tiling lessons including how to use the wet saw. That gave me enough confidence to feel somewhat comfortable using that tool. I wasn’t planning on my first job being the biggest tile job in our house but I guess go big or go home?!

The existing beige stone tile is the one that the builder installed and it’s not the worst kind but it’s also not close to being my favorite. The tile also showed wear and tear and was showing cracks on some parts of the floor. I chose this beautiful Carrara Inkjet tile for our bathroom.
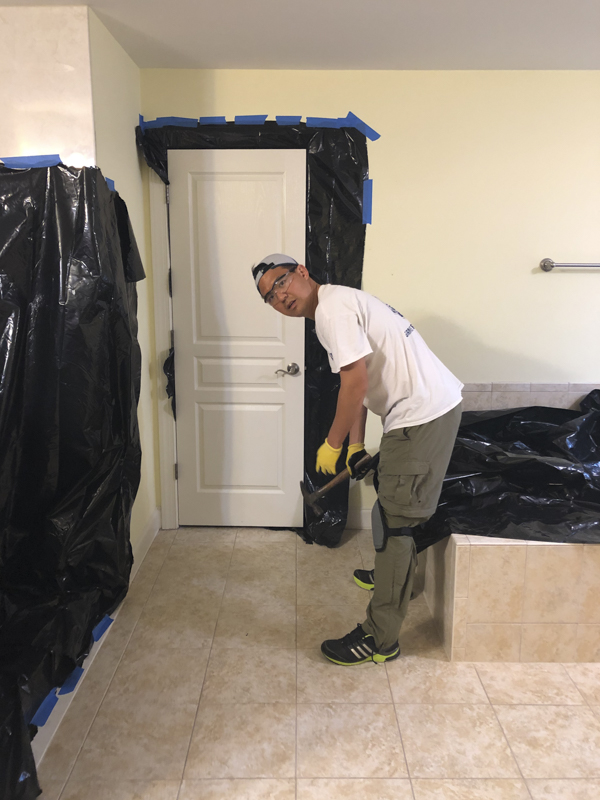
The first thing we tackled in here was removing the quarter rounds off the bottom molding. Jimmy showed me how to do this and I removed the majority of them in the bathroom. Honestly, it’s not hard and I was proud of myself for learning that one simple task. You need to remove these so that you have some clearance when demoing the tiles.

You can see that the tile wraps all around our bathtub. I’m not sure how to remove it from there but I guess we will learn!

Now, DEMO? That’s a whole other story. After removing the quarter rounds, Jimmy prepped the whole space by putting up some plastic tarps around the doors and shower walls. There is a good amount of dust and it’s important to try to keep that contained as I did not want that seeping into my closet or our bedroom. We have one small window near the toilet so we kept that open and used a portable box fan to suck out the dust from the demo. It’s also important to wear goggles and a mask to protect your eyes and lungs. Safety first!


The prep work alone took about an hour since we needed to remove all the items from our bathroom. One thing I learned later after the fact was that I should’ve removed EVERYTHING from inside the drawers and cabinets because all the items got dusty.

Jimmy started by hammering the tiles and then we used a rotary hammer with a chisel bit to remove the stubborn pieces of tile and mortar. We ran into some issues with this because we discovered a bunch of large nails sticking out of the mortar. We still need to remove those along with all the mortar now since there are parts of it chipping and cracking. The floor needs to be completely level before we place the new tiles. Again, we are learning as we go and it’s a lot!
Jimmy has a full time job and my schedule has been full with staging homes for realtors as well as private design clients. Add in 3 kids, respite foster care and managing a household, let’s just say we like to keep it interesting around here. Basically, our time is limited so we have to find time slots to work in here. We’re either overly ambitious or just plain crazy. I’d say it’s a little bit of both.

The kids wanted to see the start of the demo. It was loud! One thing blogging has taught me is to do the things that I’m afraid of. I am conscientious of what scares me but intentionally leaning into those things because honestly, it’s empowering. I have learned so many things I had no idea how to do in the past 4 years. It has been life-changing and I want to teach my kids especially my daughters that we can do hard things. Even hard things with scary tools! So all that to say, this is just another thing to add on my list that equally terrifies and challenges me. At the end I hope to say that I know how to demo a freaking bathroom and make it look amazing!

Next week, I plan on sharing my design board along with the gorgeous tiles that I chose from Jeffrey Court. It’s a beauty and I can’t wait to see it in person. Even though it looks a hot mess right now, I’m excited because I can see the final result in my mind. But man, executing sure is hard because there is just so much elbow grease that is required and we’re on a time crunch.
Sometimes, I’m thinking, “what did I get myself into?” Okay, I’m literally thinking that every second as I demo this tile.

Thanks so much for reading and be sure to check our everyone’s progress! We still have so much to do and I may or not may not be freaking out a little! #morelikealot

What a mess, I know! I need prayers, ya’ll! Ha!
xoxo,

Let all that you do be done in Love. 1 Corinthians 16:14
What a great message for your girls – we can do hard and scary things! Love that 🙂
Thank you so much, Andrea!
I have been commenting on Instagram, keep up the hard work and great job being such a good example to your children.
I appreciate the support, Barbi! Thank you so much!
You and Jimmy are so inspiring. Good luck. Can’t wait to see more and the final bathroom.
Thank you so much, June!! You are such an encouragement!