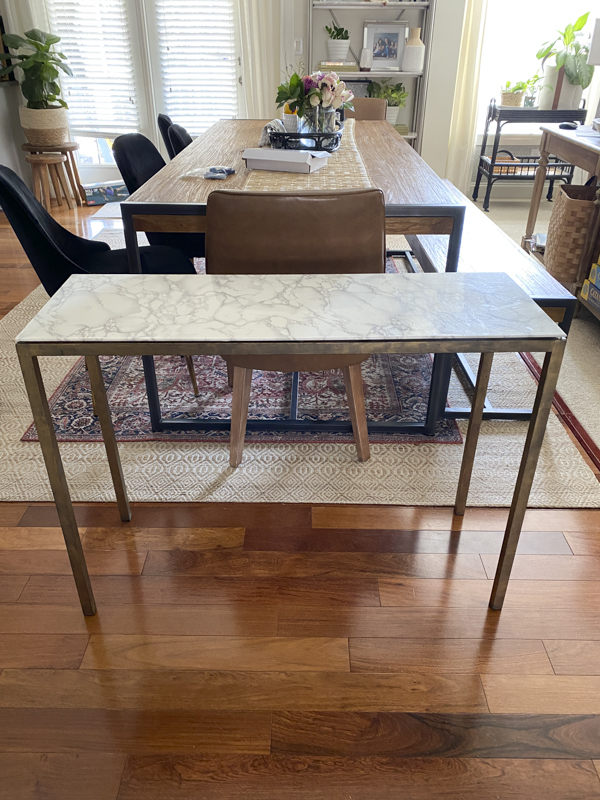
I gave my 18-year-old piece of furniture new life and built a DIY fluted console table!
I had this project in my head for months and even bought the pieces of wood then. Originally, I wanted to add the fluted pieces of trim on a nightstand. Then, I decided to add them to line the border of a large mirror we had. Finally, I decided to use them on an old console table instead. I can’t tell you how much I LOVE this new-old piece!
Years ago, I covered the glass top with some contact marble paper. I was obsessed with everything marble and thought it was a chic way to cover up the frosted glass on top. I even made the originally pewtered legs gold.
It took some time to peel and remove all the contact paper but here it is. You need to measure the length of the table so that you can make the same exact cuts for all the pieces of wood. I cut one to make sure it looked good and then went ahead and cut the rest

I laid them all down and you guys, I had the perfect amount of wood for this project. This never happens! If it doesn’t perfectly line up at the ends, I think it’s fine. Perfection is not the aim here, folks. Actually, it never is!
This is where it gets tricky. I used two types of super glue for this project. I lined most of each wood trim with gorilla glue and then used Aleene’s for the ends. Aleene’s works so so fast and bonds really well but I only had 2.5 tubes and they are really small. Aleene’s please make larger tubes of this amazing glue! I also had to rest some heavy jars to help the glue dry and set.
The tricky part of this project was working with the pieces of wood that were a little wonky. Most weren’t straight so that’s why you really need to hold it down with your hands and then something heavy. Clamps were also helpful for the ends.
The gluing down portion took a bit of time but just turn on a little music or podcast and you have some DIY therapy time.
Instead of painting, I decided to spray it matte black with my favorite brand. This stuff works fast, dries beautifully and covers so well. Spray painting seemed like a better option since I wanted it to get inside all the grooves and brushing paint may have created unsightly goops.
This is after one coat of spray paint. One piece of advice is to go one direction against the grooves for the first coat and then the other direction for the second coat. This ensures you get into all the crevices.
Oh it’s looking so good!! I also gave the legs a little shine with some gold rub-n-buff. You know how I feel about this stuff. Now for the styling part which is what I always look forward to.
I found the perfect space for it in my office below this mirror. I am so happy with how this turned out!

What do you think of this makeover? I’m so thrilled with how this turned out.
Thanks for reading!
xoxo,
Let all that you do be done in Love. 1 Corinthians 16:14
This post contains affiliate links for your convenience.


love the table Yuni!
Thank you so much!!