Using these simple tips, I’m sharing how to reupholster dining chairs in an easy and pain free way.
On the blog, I’ve shared how my chairs have gotten a dramatic update just by using paint and a simple change in cushion fabric. Changing out the fabric on a chair is an inexpensive method to reviving your chair and giving it a completely new look. I’ve been doing this for years way long before I even started blogging. Today, I’m sharing my tips on how to reupholster dining chairs so you can have the confidence to tackle this type of project too.

My SIL, Linda had her dining room chairs for over 15 years and the cushions were stained and quite dirty. Instead of buying new chairs, I told her we could reupholster them for an entirely new look. The existing fabric was original to the chairs and it had gone through 15 years of use.

Now, the type of chairs I’m talking about are the ones that have a cushion. If it has any type of cording or intricate detailing, that’s a different type of upholstery job and bit more complicated. I’m talking about a simple cushion that is screwed into the wooden base of the chairs. These are easy to unscrew, lift and new fabric can easily be stapled on.
Steps on how to reupholster dining room chairs

Step 1: Remove the cushions
You will need the right type of screwdriver or drill to remove the screws from the bottom of the cushions. After loosening and removing the screws, the cushions should fall right off the base.
Step 2: Place the cushion on top of the fabric
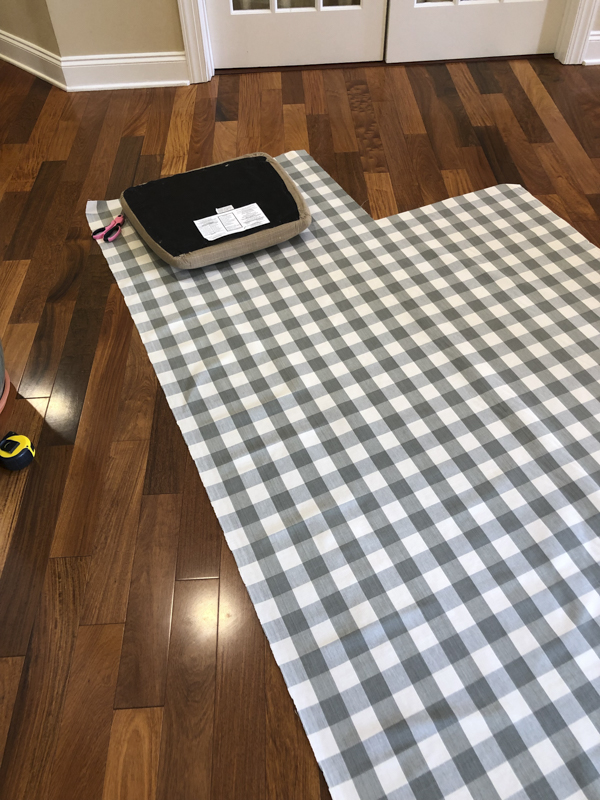
You can choose to unstaple the old fabric off the cushion but since these have never been replaced, I just left them on. I recommend using thicker material since the cushions get such a beating from heavy use.
The type of fabric I’m talking about is sold in large bolts at your local craft and fabric store. You usually buy it by the yard. You can usually find a coupon online so always double check before buying! For Linda’s 8 chairs, I used about 5 yards of fabric since her chairs are quite large.
Step 3: Measure about 2-3 inches around the perimeter of the cushion.
You want to give your cushion at least 2-3 inches so that you have enough fabric to pull around the cushion seat. This will help you to have enough fabric to pull it around tightly and staple.
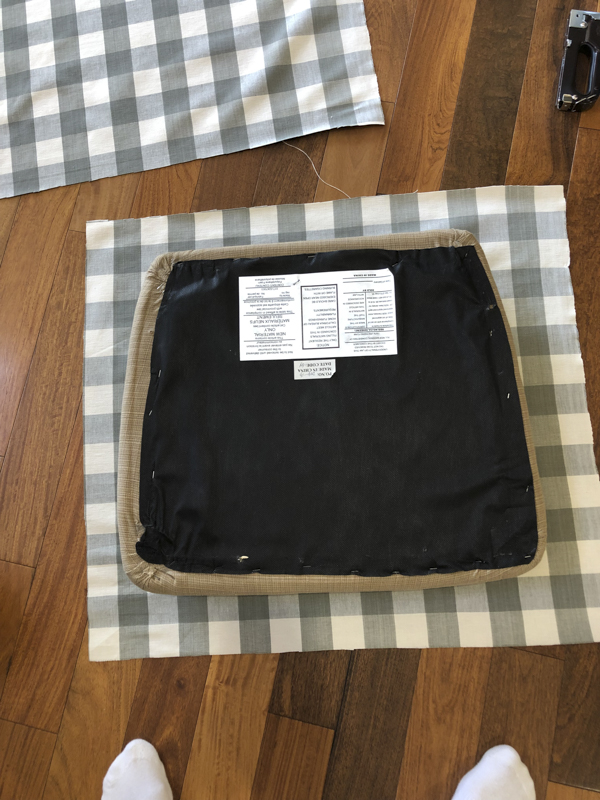
Step 4: Start stapling the top and bottom first

I’m NOT a professional but this is just how I do it. Also, please make sure that your line up the fabric if it has lines or has a design on it. Ie: Make sure the lines are straight. If there is a picture of a flower or animal, make sure you don’t cut those images off. You want to make sure those images fit on the cushion. Cut appropriately around any images because you don’t want a bird cut in half on your cushion. You get what I’m saying? I use a stapler similar to this one.

Thankfully, I had enough fabric. Remember when I used this same fabric for my corner kitchen windows?
Step 5: Keep pulling the fabric tightly and staple around.
Pull in the corner and wrap the edges around. It doesn’t have to look perfect but just make sure that it’s clean and tight. The fabric will be forgiving and will look better once they are positioned back into the base.

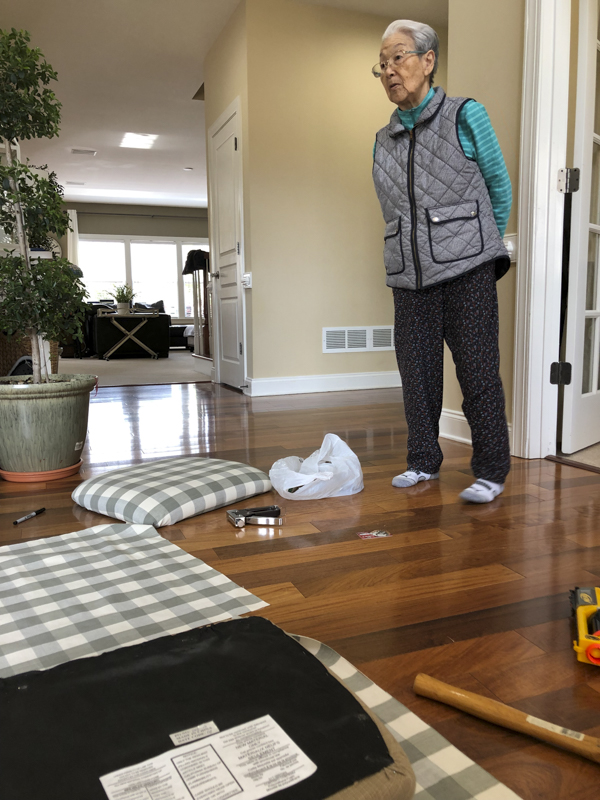
Granny June came over and double folded the edges. I told her this was unnecessary since no one would look at the bottom but she insisted. Granny has Alzheimer’s but she’s as sharp as a nail when it comes to these types of things. She also used to be an expert seamstress and entrepreneur in her younger days.
Side note: if you were getting these done professionally, they would also be double hemmed and would show no raw edges. I however do not do this because when it’s for my personal use, I care more that it’s done than if it’s perfect. It’s all personal preference.
Step 6: Cut off any excess fabric.
This is also a good time to hammer any staples that are jutting out. These suckers are sharp so be careful. This job isn’t hard but my fingers hurt afterwards from all the stapling.
Step 7: Position appropriately and screw the nails back onto the chairs.
If you have similar chairs that need an update, this is a great way to give them an entirely new look. You just need about an hour or two and you’ll have new chairs in no time. I hope this tutorial was helpful for you. Be sure to pin any image from the post so that you can save it for future reference.
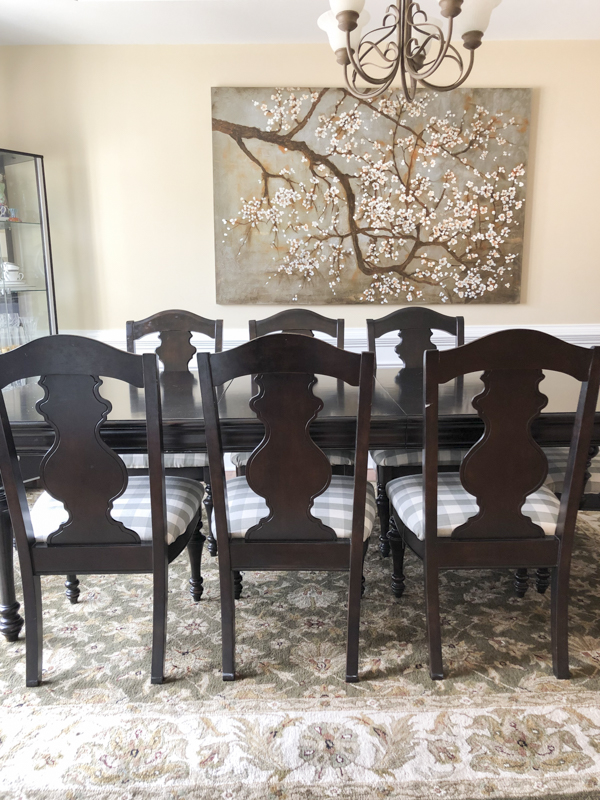
We all loved how the neutral pattern still worked with the rug and the other traditional elements in Linda’s dining room.

Here’s another closer look at the new cushion!

These were free 99 since I already had all the supplies. Linda loves the new change and most importantly, they are Granny June approved!
Here are some other chair projects I’ve done in the past.


Thanks for reading, friends!
xoxo,

Let all that you do be done in Love. 1 Corinthians 16:14
This post contains affiliate links for your convenience.