Here’s how to prime and paint wicker furniture with ease
#Sponsored Wicker has made a big comeback in both furniture design and decor. Wicker can look dated and bland but now there are so many different ways to achieve a modern look with various colors and styles. I recently thrifted a cute wicker dresser that needed a little care and elbow grease. If you have wicker furniture that needs to be updated, here’s how to prime and paint it using KILZ® Primer.
This post is sponsored by KILZ® but all thoughts, opinions, and styling are my own. #EveryProjectisWorthIt
For this particular project, I used KILZ® ORIGINAL Oil-Based Primer spray. This is a powerful stain-blocking formula that blocks most heavy interior stains including water, smoke, tannin, ink, pencil, felt marker, grease, and also seals pet, food, and smoke odors. I chose this convenient aerosol since it’s great for small projects and I knew it would get into the tough areas of the wicker where a brush would be difficult. You can use this primer on almost all interior surfaces and it will keep your paint job looking professional with long-lasting results.
INSTRUCTIONS
Step 1: Clean
Clean your entire piece of wicker. Make sure to get rid of all the dust, debris and wipe it down if necessary. This is also a great time to clean out the drawers and remove any dirt and grime. Originally, this wicker dresser came in a variation of tan and peach hues. The color was outdated and it needed a new paint job badly.
Step 2: Remove hardware
Remove any hardware that’s attached to the furniture. I decided to go with a different set of knobs because the dresser was missing one pull. After removing the old hardware, I drilled one hole in the center for the knob. I skipped filling the existing holes because they were not that noticeable due to the wicker pattern.
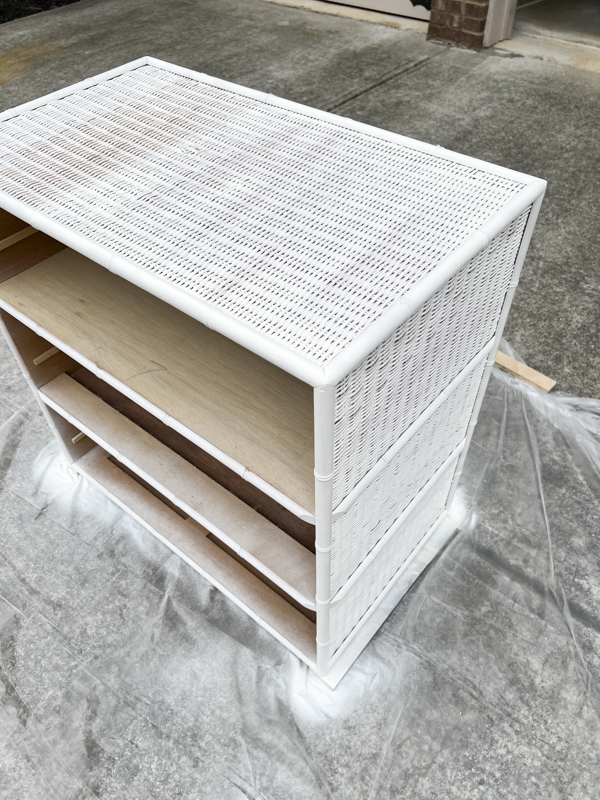
Bring everything outside and prepare your area for priming and painting. I normally use a tarp or plastic paint liner to cover the driveway.
Step 3: Prime your first coat
Shake your KILZ® ORIGINAL Oil-Based Primer spray for a minute. Lightly spray the furniture for your first coat. After you’re done, wait about an hour for your next coat. I love how quickly the primer dries. They recommend doing 2-3 light coats for a full coat. I did 2 light coats and it looked great because the primer had great coverage.
Step 4: Paint
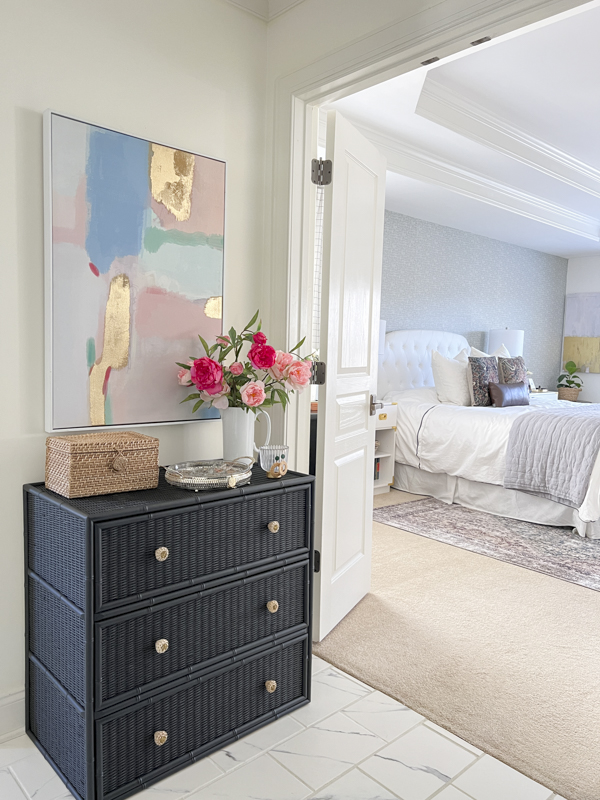
Once everything is completely dried, you can now add color with another spray paint. I chose Behr chalk spray paint for a matte look and went with this gorgeous Noir color. It looks modern and super chic!
The dresser took 2 light coats of spray paint. Once it was fully dried, I brought it inside to cure.
Step 5: Add your beautiful new hardware
Naturally, you can use the existing hardware but adding new pulls or knobs can really update an old piece of furniture. I was able to find these cute wicker knobs from a local craft store and they were perfect for this dresser. The contrast of the tan wicker against the black looks clean and beautiful. It’s amazing how just paint and new knobs gave this dresser a totally new look and vibe. This piece would be so expensive if I bought it from a retail store!
I went another extra step and lined the drawers with some leftover wallpaper I had on hand. It’s a small detail that brings a smile to my face when I open the drawers. This is a way to use up those wallpaper remnants. I used this particular wallpaper in our water closet and am so happy to add some more to this bathroom dresser.
This project was so simple and it completely transformed this piece of furniture. What was once a splotchy painted dresser now looks completely chic and sophisticated with a new paint job and knobs. It’s easy, inexpensive, and a fun way to totally change the look of any wicker piece of furniture.
I styled it in my bathroom and am so excited to have this in here to hold all of my undergarments and exercise clothes. This project is creating healthy habits by keeping my exercise clothes easily accessible! I really needed a dresser in the bathroom especially since Jimmy works from his office which happens to be in our bedroom. There have been many moments when he was on a conference call and I really needed to get my underwear from my nightstand drawer after a shower! I am so pleased with the results and having a clean and healthy space. 🙂
Let’s do a last side-by-side comparison!
BEFORE
AFTER
I hope you found these steps helpful. This is such a great way to transform my home into a haven. It’s unique and absolutely gorgeous!
If you have any questions, please leave them in the comments section below. Check out my Instagram for some behind-the-scenes steps.
xoxo,
Let all that you do be done in Love. 1 Corinthians 16:14
This post contains affiliate links for your convenience.


