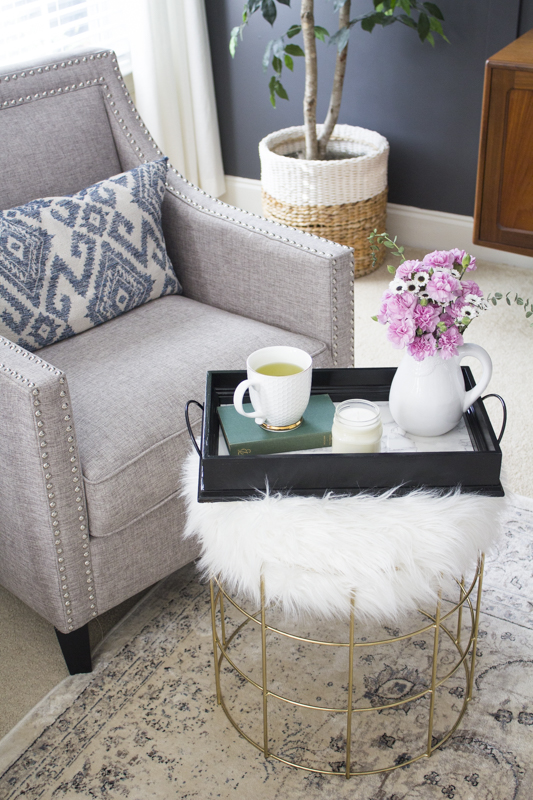
This DIY marble contact tray is an easy example to updating a piece of decor in your home.
This DIY marble contact tray is one of the easiest projects I’ve done in a long while. Did you know that there’s such a thing as marble contact paper? It’s no secret that I love everything marble. Marble cake platters, marble tiles, marble backsplashes, etc. The list goes on. I love the classic, modern sleek look of marble. However, that junk is expensive!
Here’s a really quick ghetto-fabulous video I created just to show you how easy it is.
The possibilities are endless when it comes to applying this contact paper on different surfaces. It has a high quality gloss paper so it honestly looks like the real thing when applied properly. All you need is an old tray, paint and this marble contact paper.
If you remember my last one room challenge, I actually used this same marble contact paper for my console table. We’ve had this table since we first got married. It was purchased from Crate and Barrel over 14 years ago and it used to have pewter legs. Well that’s until I used rub-n-buff to make the legs an antique gold finish. Here’s what it used to look like. Affiliate links are provided in this post for your convenience.
See how it had a frosted glass top? I applied the contact paper and voila! Much better if I do say so myself.
Doesn’t it look like marble? Oh I love how chic it looks.
Since I had some marble contact paper left over, I decided to update some of my really old outdated trays. I took two beat up wooden rustic trays and I made them new again.
Here’s how you can do it too!


- Give that old tray a coat of paint. I used a high gloss black paint for mine.
- Make that 2 coats to give it a nice, clean finish.
- Cut your contact paper according the width and length of the tray bottom. Cut out the measured size.
- Carefully peel and place the contact paper on the bottom of the tray. Use your hands or an instrument slowly to smooth out the paper. There will be little pockets of air that are trapped so push them out carefully.
- If any air pockets remain, you can use a tiny needle and poke tiny holes along the vein of the marble paper. That will release the air pockets and you won’t be able to notice the holes very much. You can also use a razor blade to clean up the edges if the paper runs to the sides.
- If you want to add another touch, apply some rub-n-buff to the tray edges. That’s it! Style your new tray in your home. I was thinking about donating these two ugly trays but that’s until they got new life again!
It’s a simple way to update your old tray. This can also be used on other surfaces like a console table like I did for the bathroom makeover. Just be careful when applying the contact paper and tuck in the edges and corners to give it a clean finish. Beware, you may start applying contact paper to everything. I just had another idea pop in my head. They would look so great lining some book shelves don’t you think?
Look at her looking all new and shiny? What a show-off.
The possibilities are endless! Be sure to pin this image to keep for the future.
Thanks for reading, friends.
Yuni
Let all that you do be done in Love. 1 Corinthians 16:14


Wow!! What a transformation! Who would have thought it was contact!! Looks fabulous on the table top too!
Thanks, Sam! yeah, that stuff is amazing!
I love marble in all shapes and forms…both that tray and your table are GORGEOUS!!!
Thank you so much, Lynn! I appreciate that!
I love the marble contact paper. I place some on foam core board and sometimes I shoot my recipes on it! Our granite kitchen countertops don’t photograph well, so this does the trick. Next kitchen will have white quartz! I love how your tray and table came out!
I love that idea, Janine!! How clever!!
Such a good idea, Yuni! I have some of that contact paper so I need to get busy!
Amanda, it’s the best! I love using it!!