Using a few tools and supplies, I’m sharing how to make a modern bulletin board.
Today, I’m partnering with my friends at Bernzomatic to share how I built my own modern bulletin board. At the start of the new year, I really wanted to hunker down and organize my office. As a designer, I am constantly working on a myriad of projects and collecting all sorts of images, fabrics and scraps. I’ve wanted an inspiration board for a while and this was the perfect opportunity to build my very own modern bulletin board.
This post is sponsored by Bernzomatic but all thoughts, opinions and styling are my own.
I absolutely love how this turned out and was so excited to use the Bernzomatic TS8000 torch to create the design!
I know you can go the easy route and just buy a regular bulletin board at the store. To tell you the truth, I couldn’t find one that fit my aesthetic and didn’t look so office-y. This is a big reason why I’m passionate about DIY. It’s having the freedom and creativity to build something exactly the way you envision it.
I have been interested in the Japanese method of Shou Sugi-Ban for quite some time. During the 18th century, the Japanese used this technique of charring wood to create a deep charcoal black color. It was a method used to weatherproof wood and the look is quite beautiful. I decided to mimic this technique using my Bernzomatic TS8000 to create a gorgeous charred surface to the trim around my bulletin board.
HERE’S HOW TO MAKE YOUR OWN MODERN BULLETIN BOARD
MATERIALS:
- Bernzomatic TS8000 max heat torch and Bernzomatic map-pro cylinder
- Strips of wood for the trim
- Large sheet of plywood (mine was less than an inch thick)
- Fabric of choice
- Sawtooth hangers
- Gloves
- Polyacrylic
- Cloth
TOOLS:
- Brad Nailer
- Hammer
- Staple Gun
- Miter saw or something similar to cut the wood
DIRECTIONS:
Step 1: Take your fabric and wrap it taut around the plywood.
I carefully wrapped the fabric around the edges and stapled it against the back of the plywood using a hand staple gun. Pull it tight to ensure it’s smooth on the right side. Cut off any excess from the back. One tip is to pull in the corners so that it has the smoothest edge possible. The larger the bulk of fabric, the more difficult it is to have your wood trim sit flush at the edges.
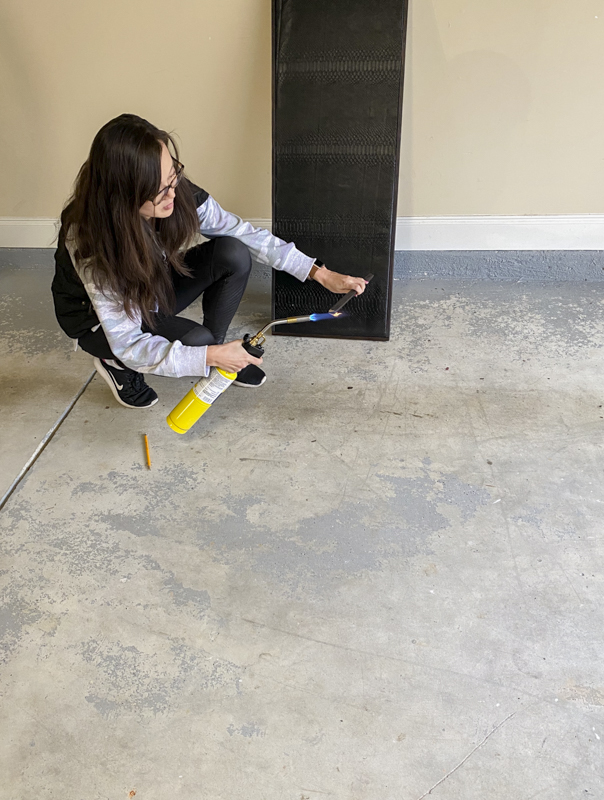
Step 2: Using the Bernzomatic TS8000, burn the wood trim.
What I love about the this particular torch is that it’s designed for a multitude of projects. It torched the wood quickly and created the perfect charred look without much effort. The fully adjustable flame and pressure regulator made it ideal for this particular type of project.
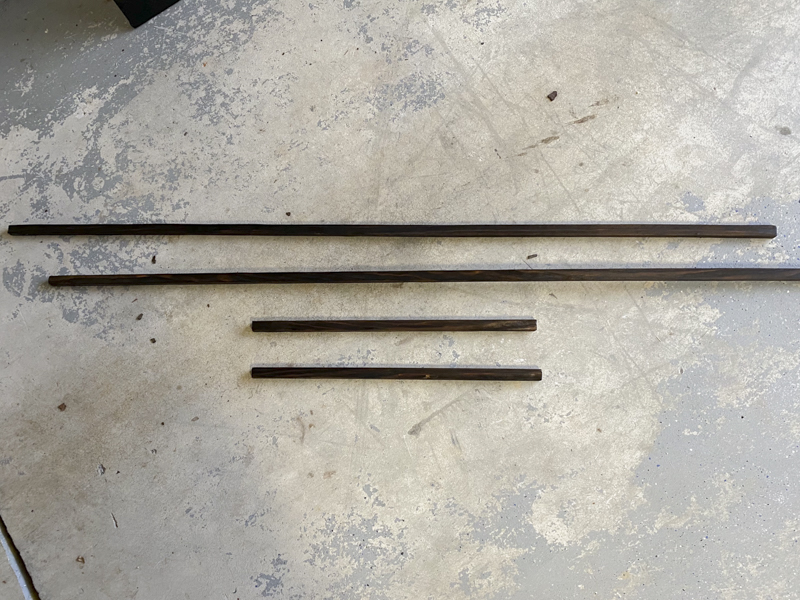
Step 3: Measure the sides of the bulletin board and cut the strips of wood.
I recommend cutting it a little larger and trimming them down one at a time right before you nail them in. I just made simple straight cuts at the ends where the corners met up.
Step 4: Add a polyacrylic coat to the trim pieces
When charring the wood, it will leave a lot of black residue on the wood. Taking a piece of cloth, rub on some polyacrylic. This creates a smooth look, removes excess residue and gives it a nice protective finish on the wood.
Step 5: Install the wood trims to the plywood using a brad nailer.
I measured one side at a time and then attached that particular piece of trim to the edge of the plywood. I used a brad nailer to attach the trim and have it sit flush against the edges.
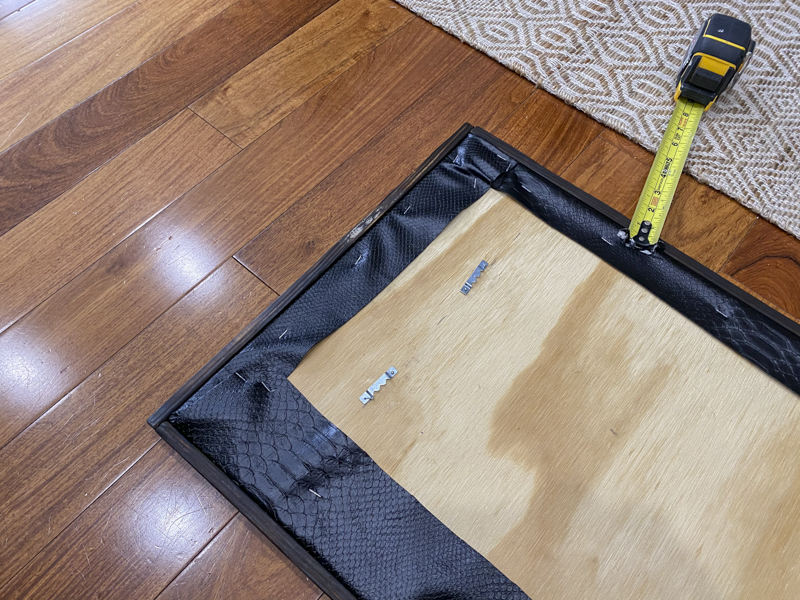
Step 6: Attach sawtooth hangers to the back of the plywood
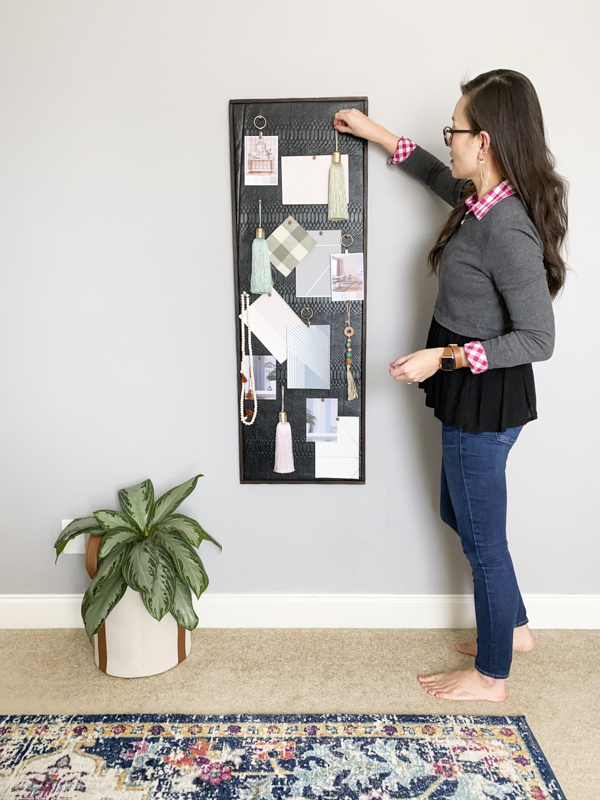
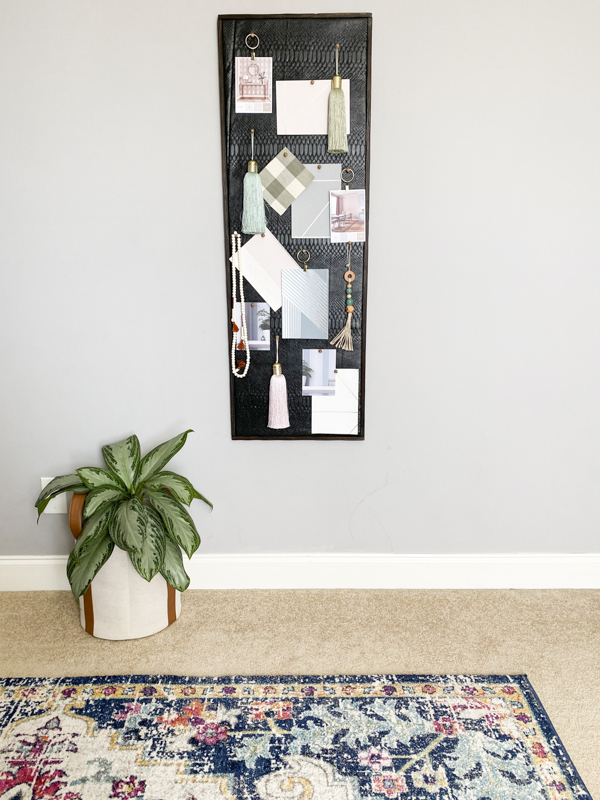
You will need a way to hang the bulletin board so attach two sawtooth hangers. Hang it up on your wall and enjoy your new, one of a kind, modern bulletin board! The possibilities are endless with the variety of fabrics out there. I just had to use this faux leather crocodile fabric because I have really been digging all the animal prints out there this season.
I’ve already added my favorite inspiration images to my modern bulletin board and it’s the perfect addition to my office.
I hope you found this tutorial helpful. I’m excited to share a bunch more DIY ideas using the Bernzomatic torches. If you want to see more projects using the Bernzomatic torch, check out my DIY printer box, candlestick holders and delicious baked pumpkin french toast with caramelized walnuts.
Thanks for reading! Be sure to check out my IG and FB for the video tutorials.
xoxo,
Let all that you do be done in Love. 1 Corinthians 16:14
This post contains affiliate links for your convenience.







Love this!
Thank you so much, Bridget!